12/18/18
After doing this so many times over the past few years I’ve always wondered why I’ve never made an article on it since it would make other peoples lives easier.
You might have a scenario where you’d like to map a DVR or maybe a NAS to a public IP address. This can be literally used for anything like a printer, server ,desktops, camera, DVR, storage appliance; pretty much any IoT.
Below are step-by-step instructions on how to setup a 1 to 1 NAT with a firewall rule.
For this scenerio we should establish a baseline of facts so you cna follow along:
Mock DVR’s LAN IP (Private): 192.168.40.10 /24
Mock DVR’s WAN IP (Public): 88.67.134.242 /29
Step 1:
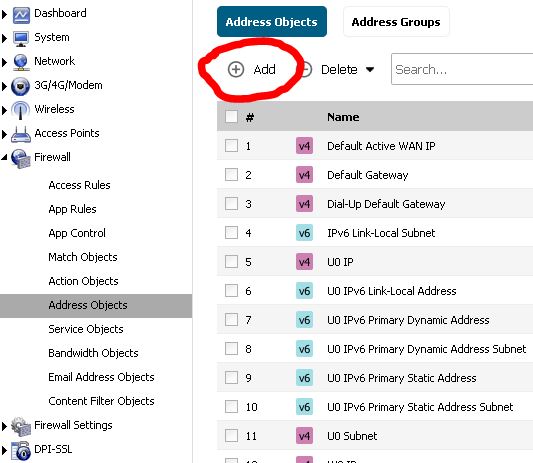
- Login into the Sonicwall and go to the following section: Firewall > Address Objects. Inside of here create a new Address Object by click on the + sign
Step 2:
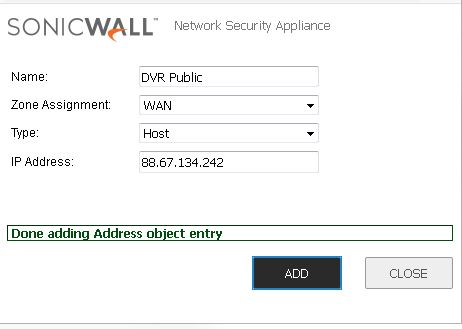
2. Enter in a name for the DVR’s Public address. Take note of how it’s setup in the picture.
Step 3:
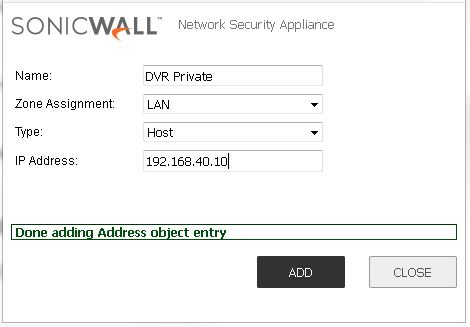
3. Enter in the name of DVR’s LAN address. Take note of how it’s setup in the picture. Gosh I love picture they explain shit so much better than I want too cause I’m lazzzy! 😛
Step 4:
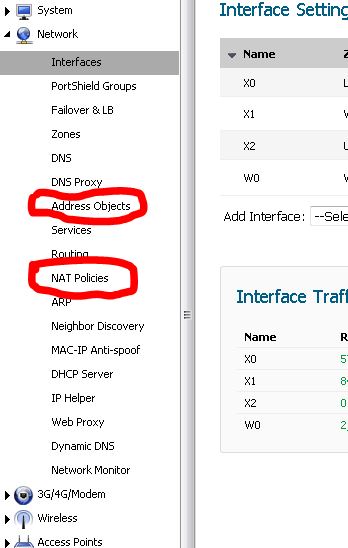
Go back to the main dashboard and navigate to Network > NAT Policies and look for the Add button.
Step 5:
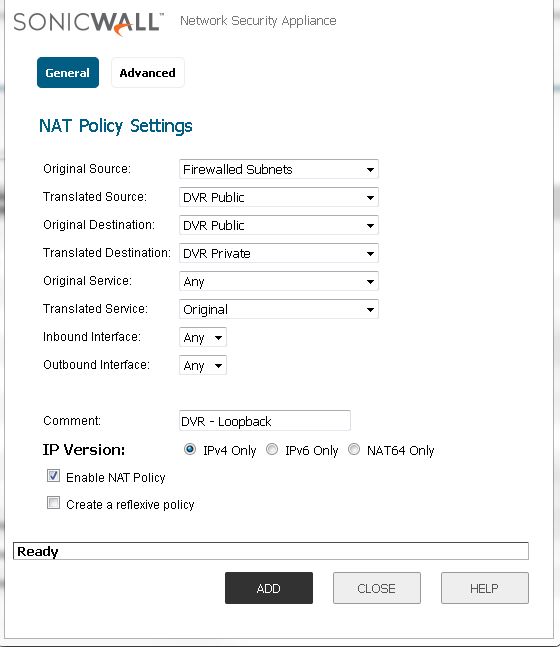
Now we must create a loopback NAT policy. Essentially what a loopback does is it allows us to resolve the 88.67.134.242 address internally on the local network. As we all know whenever you try to call yourself you get a busy signal, same principal. So we have ot make a loopback that once it hit the firewall subnets (LAN) it loops back on the public address (WAN) and get translated into a private address (LAN) in this case the public address of 88.67.134.242 would resolve internally to 192.168.40.10 while looking like 88.67.134.242. 😉
TL;DR – just follow the picture. 😛
Step 6:
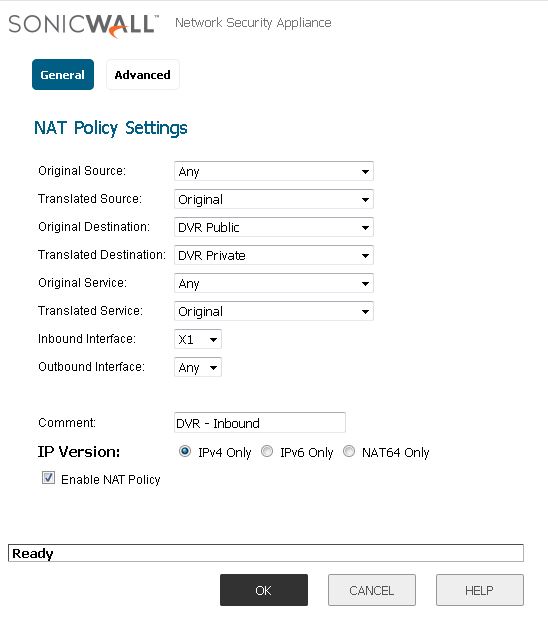
Now we much create the Inbound NAT rule from Public to Private network address translation otherwise known as NAT. Follow the picture, pretty much explained what this function does, do take note of the interface as that’s important.
Step 7:
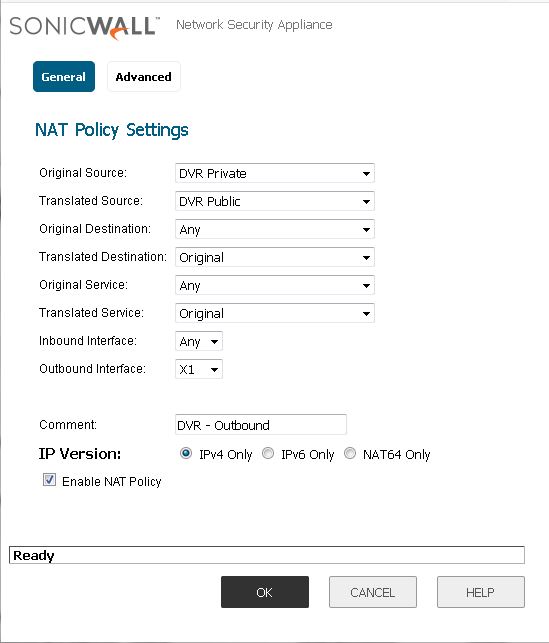
Now we must create a NAT policy for the Outbound rule. Follow the picture and again take note of the interface.
Step 8:
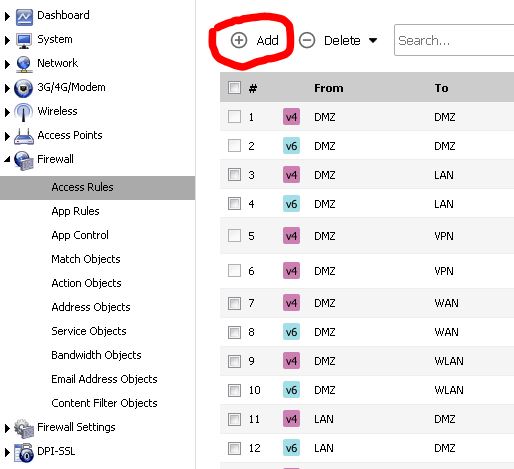
Now that we got the NAT Policies done we need to poke a hole in the firewall so it can allow the Public address into the subnetting networks aka the Private network. Start off by going to the main dashboard and then going to the Firewall > Access Rules > + Add sign.
Step 9:
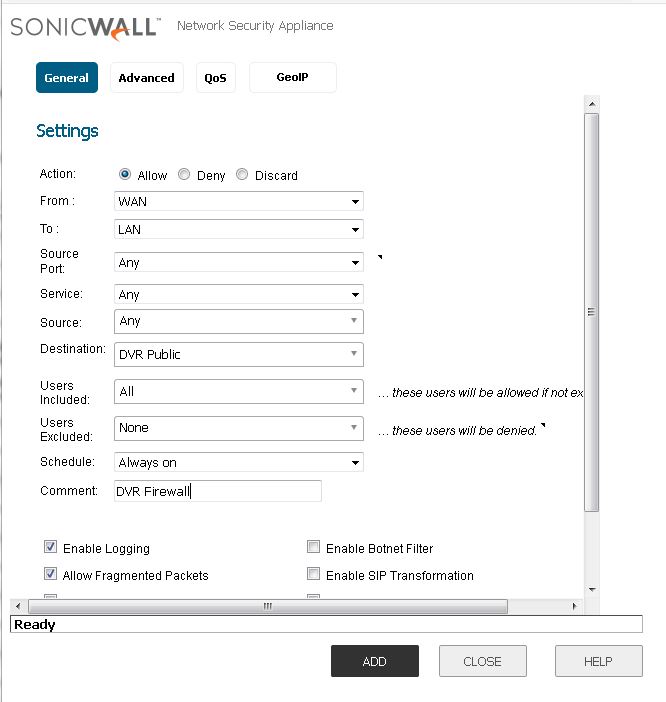
Now make the rule coming from the WAN into the LAN with the destination being the DVR’s Private address. We do this cause the firewall has the Public address of the DVR setup in the other steps so it knows what to do from the NAT policies once a connection is requested via the DVR’s public address, in this case it’s the destination. Once it hits this destination based on this rule, the NAT policy does the translation into a private address; in this case that the DVR’s Private LAN address. Follow the picture to do this for you.
This concludes this step-by-step instruction on how to setup a 1-to-1 NAT policy with a firewall rule. Obviously you can reverse engineer this to your purposes, and also this DVR’s public and private address don’t actually exist but this was purely done to show how ot set this up on a Sonicwall.
Enjoy!
-Trevor