Many people always wonder how you setup vLAN’s between the interfaces on the physical ESXi hosts and the physical network fabric. After the network engineers setup the physical Etherchannel or port channel groups with the desired trunks of the multiple vLAN’s it then falls to the VMware engineer to connect the dots and make the servers and such in the VM’s connect to their respectful networks for correct data transfer.
After many hours myself of figuring out how to do this, the following setups are how you do this. Since I’m a experienced network/storage/systems/VMware engineer I’ve deployed these through the complete spectrum of the IT infrastructure so I understand how this works from multiple angles.
Lets get started!
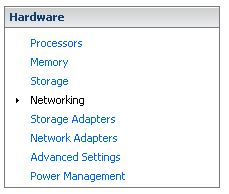
Step 1: Click on your ESXi host and click on networking, as shown below.
Step 2: click on Add Networking, note if you are adding to an existing vSwitch for a bonded connection also known as a Etherchannel or Port Group, then click on the Properties of that vSwitch, if your making a completely new vSwitch on a different Physical Trunked connection then click on Add Networking of the Networking tab in general, as if your starting from scratch.
Again, this step can go two ways, you can make the Port Group on it’s own vSwitch with it’s own vNIC’s or you can add the Port Group to an existing vSwitch that has multiple vLAN’s attached on a aggregated connection or Etherchannel/Port-Group. Either of them will work, but in this scenario we’ll be adding it to an existing vSwitch that has multiple bonded (Etherchannel)connection that increases throughput of the ESXi hosts to the physical network. Basically these difference are purely from a design standpoint.

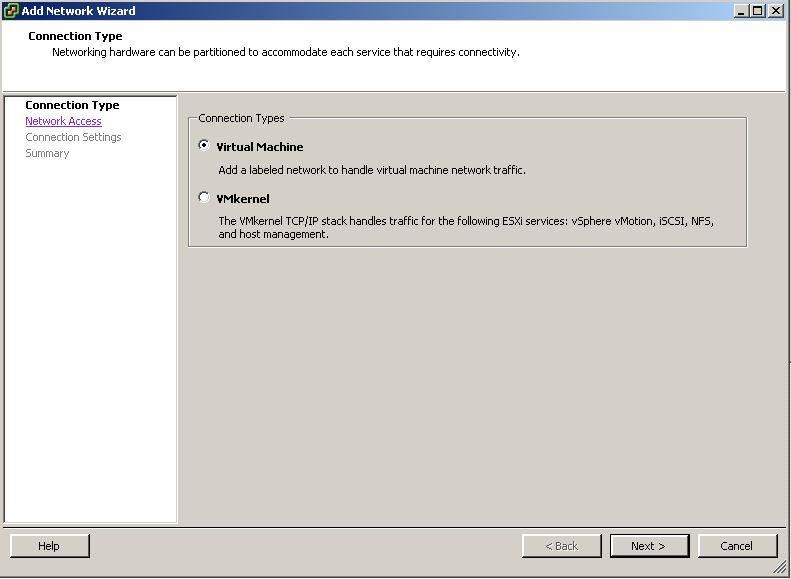
Step 3: Make sure that this point you click on Virtual Machine, so you can make a Port Group, as shown below.
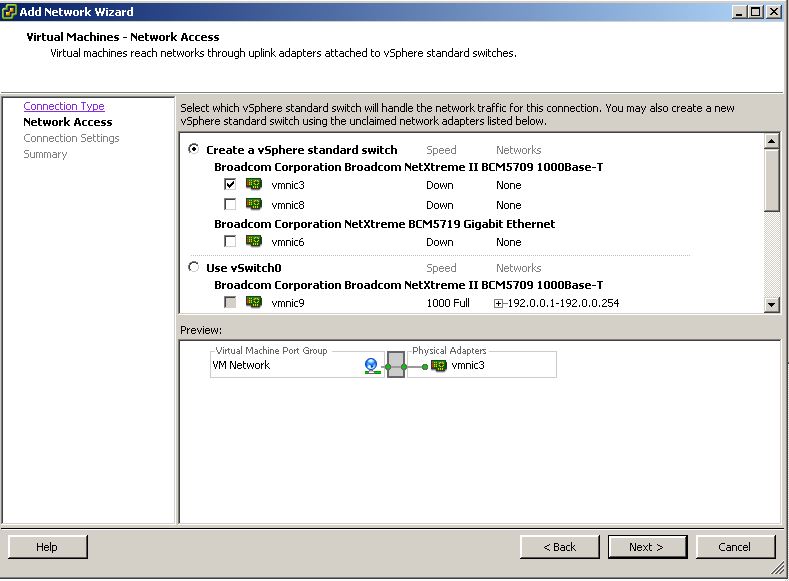
Step 4: Select the vNIC that you want to connect to this Port Group. NOTE: this vNIC is a physical NIC card that is connected to a switch. On the switch, it would be associated with the vLAN in question.
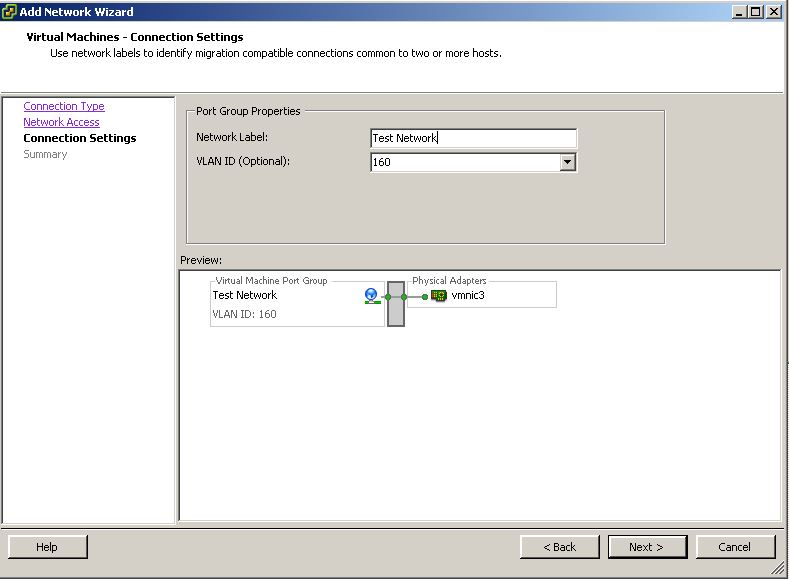
Step 5: At this point, you make a name for the network, say for instance this is a vLAN for Printer, and the vLAN is vLAN 160, then you would place the vLAN ID of 160, as shown below into the field in this step of configuration. NOTE: the vLAN ID must match the vLAN ID of the vLAN on the physical switch, once your finished, press next and then hit finish.
Step 6: Click on the VM in question that you want to associate the new vLAN with just like adding another other hardware to the VM. Click on Edit Settings.
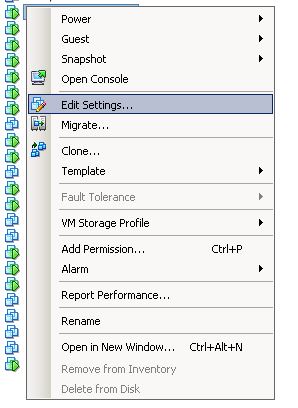
Step 7: Click on the Add button to add new hardware.
![]()
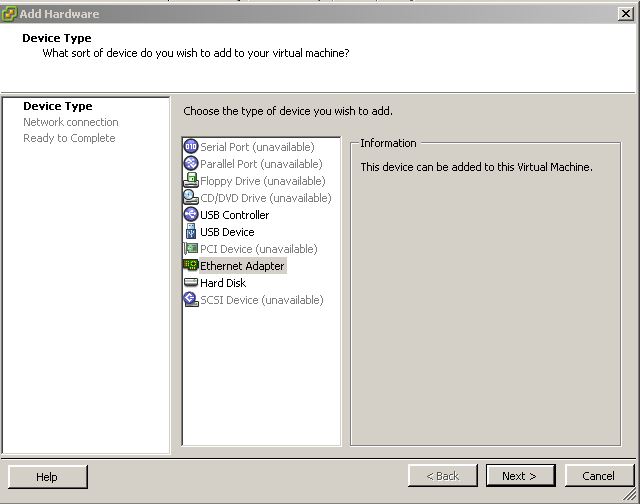
Step 8: Click on Ethernet Adapter and then press next.
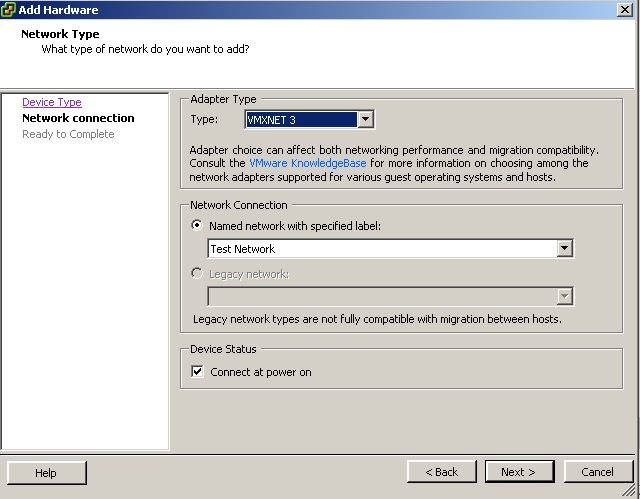
Step 9: At this stage, and final stage, select the VMXNET 3 option and then select the new Port Group you created in the previous steps as the network associated with this vNIC on the VM. NOTE: E1000 only works at 1 Gigabit whereas VMXNET 3 operates at 10 Gigabit. Also realize, that if you use the VMXNET 3 type, if this server is on the same host of another server the connection between the two hosts on the same ESXi host will move at 10 Gigabit regardless if the connection leaving the ESXi host is less than 10 Gigabit. Just something to remember if you have a VM affinity rule, but that’s another blog posting altogether.
Once your finished, press next and then finished.
Lastly, once these Ethernet adapters are setup there is still work that needs to be done in the VM. If you runs a Windows server, you will need to setup the network IP addressing on the network cards. If you know networking and the principles behind this then you know what I’m talking about. If you don’t please ask your network administrator for this information.
Once you have the networking setup, you will need to route traffic out the correct interfaces, you can find this blog posting on this subject and this will explain how to do this here: Click here: Setting up Persistent Routes when having Multiple vNIC’s with different vLAN’s.
I hope this has been informative and I’d like to thank you for reading.
~Trevor