11-21-18
I seem to always be setting up SSL VPN’s in customer Sonicwall’s and I figured why not write something up so that I can reference it when my brain is less sharp or I’m just too lazy to teach others how to do it. So below is a step-by-step on how to do this in in SonicOS 6.2.x+.
Step 1:
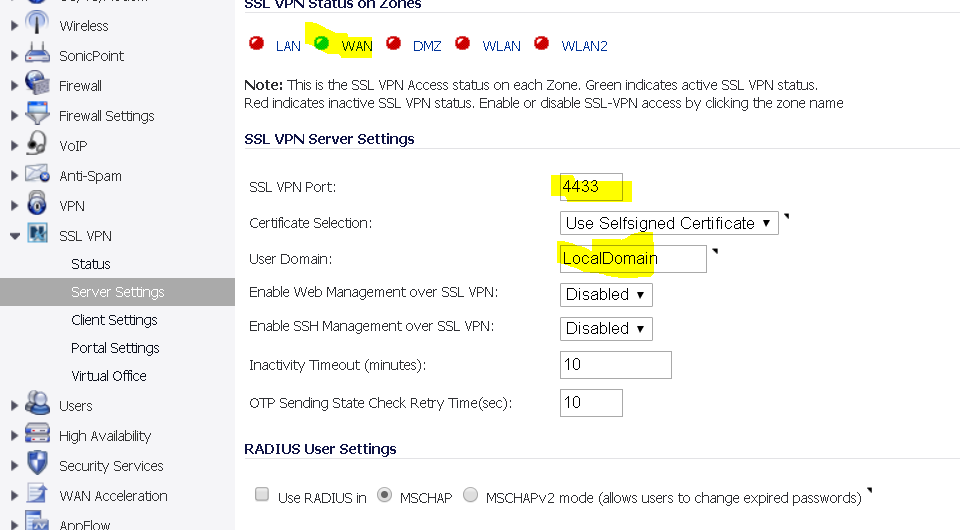
Go to the main dashboard and navigate down to “SSL-VPN” and click on “Server Settings”, you’ll see, as shown in the picture a bunch of red dots, you want to literally click on the “WAN” dot to make it turn green. Be sure to take note of the port you use and the domain name, I like to change this port to something very high and something that is not normally used.
Step 2:
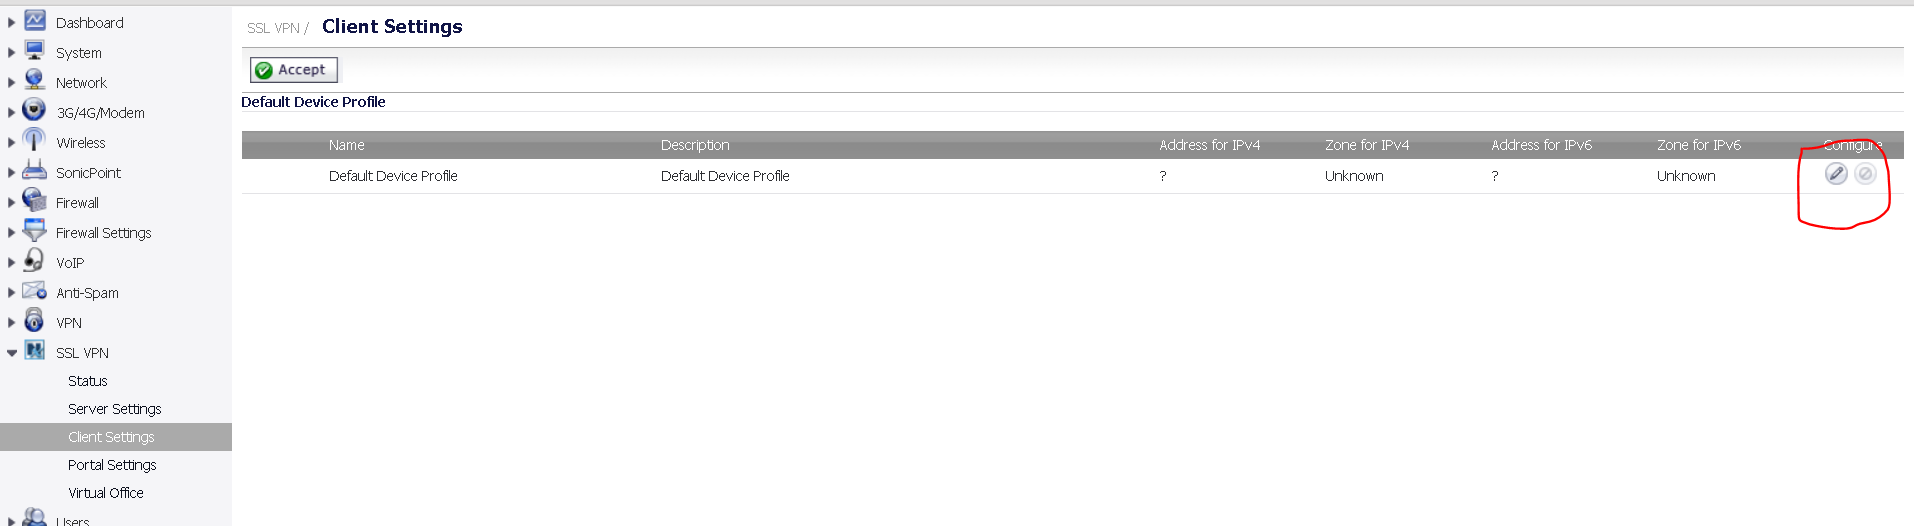
While in the “SSL-VPN” section click on “client settings” and on the far right, as shown in the picture, click on the pencil.
Step 3:

This will open a new window, in the setting tabs, in the drop down for the IP v4 Zone click on “– Select a network–” and click “create a network”.
Step 4:
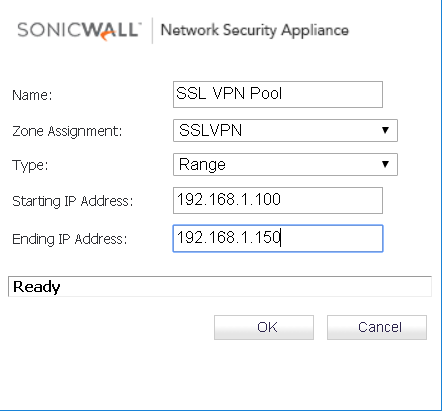
This is where you create the DHCP pool for your VPN network, call it whatever you like and in the “Type” select “Range” and define your range, like shown in the picture above as an example. Press “OK” but don’t close the window from Step 3 quite yet.
Step 5:
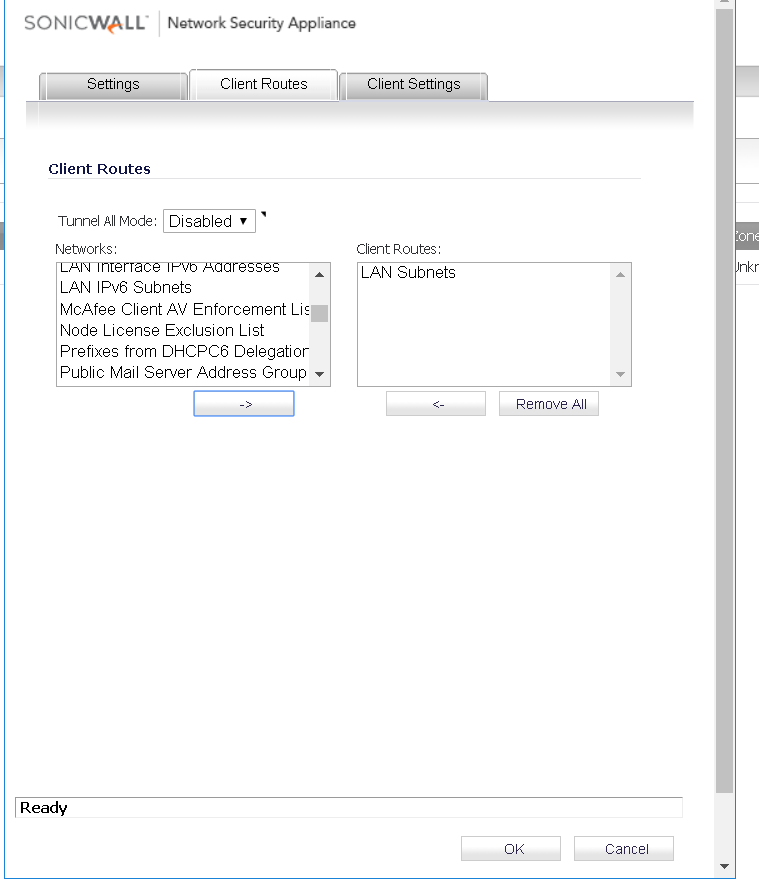
While in the same window as settings, click on “Client Routes” and select the internal network you want to give VPN access too, in this example the internal “LAN” subnet is used. Again, don’t press “OK” quite yet.
Step 6:
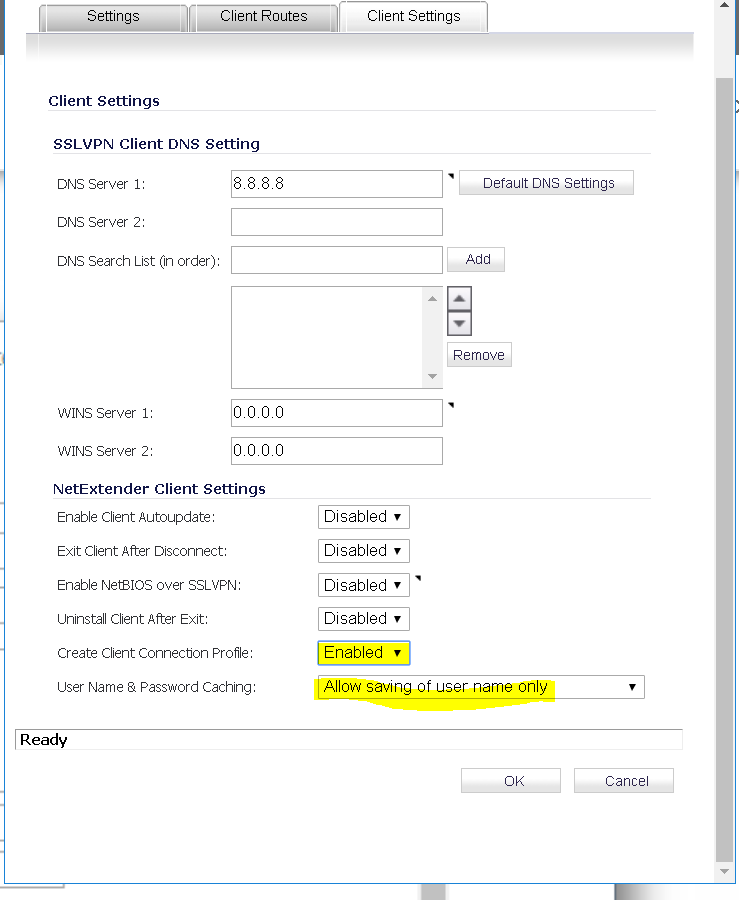
While in the same window as the previous two step, click on “client settings” and make sure the following settings as shown above highlighted are selected. You can modify the last setting at your own risk. Then press “OK” to close this window and saved the past 3 steps.
Step 7:
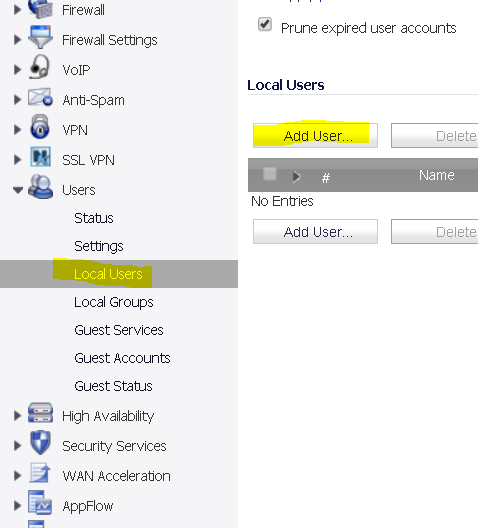
Back on the main dashboard click on “users” and then click on “Local Users” as shown in the picture above.
Step 8:
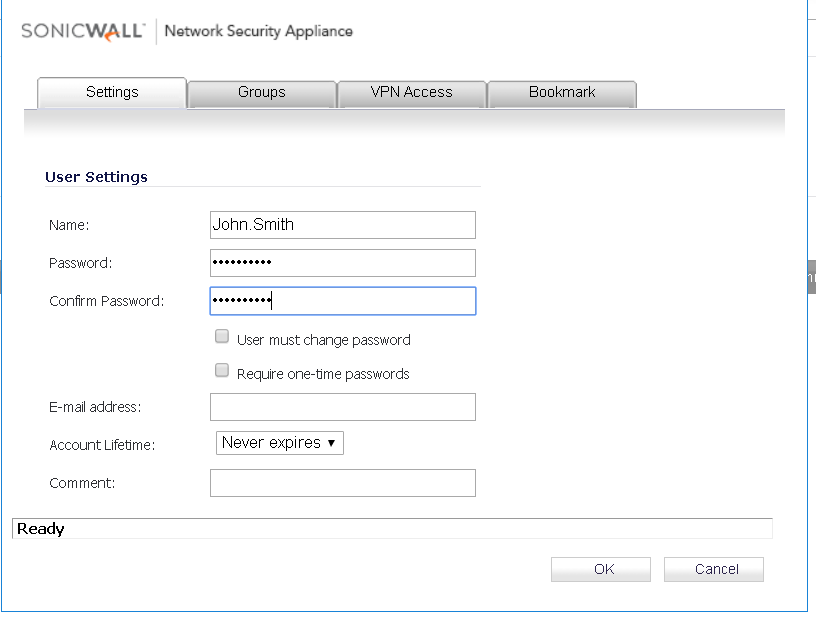
Create your user for remote access and the password desired. Don’t press “OK” quite yet, move on to the next step.
Step 9:
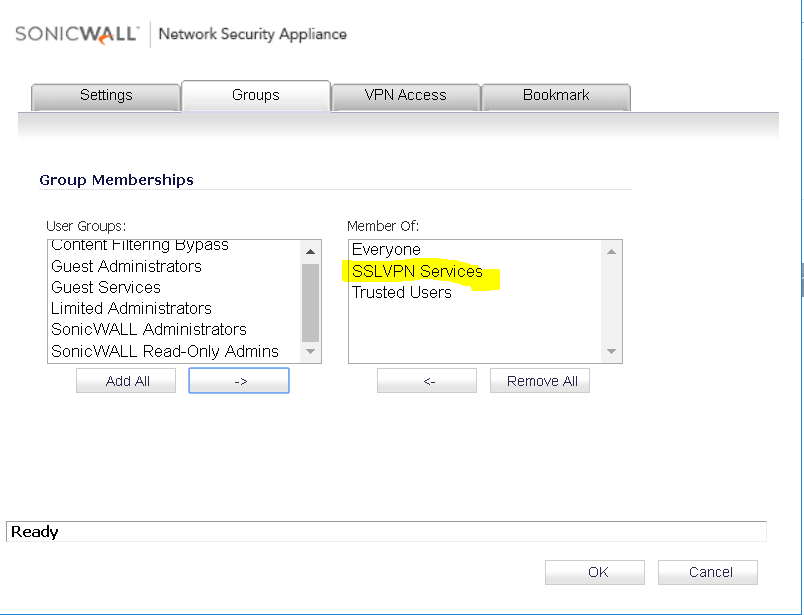
Click on the “SSLVPN Services” group and then don’t press “OK” quite yet and move on to the next step.
Step 10:
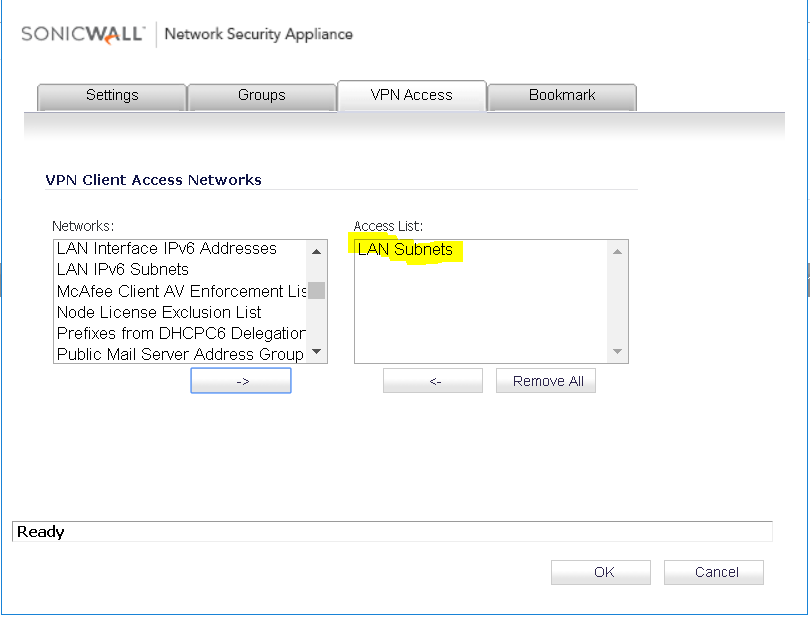
Click on “VPN Access” and select the network you wish to use for this users VPN access. Now you can press “OK” once the access list is finished.
Step 11:
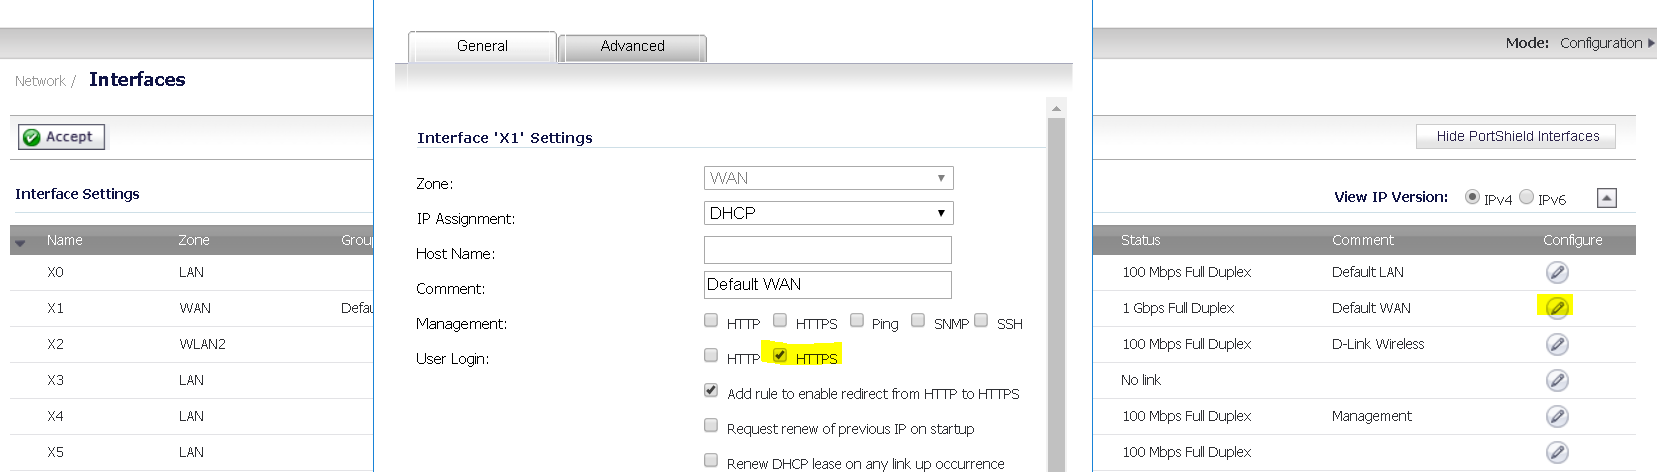
Last step is to enable HTTPS access for the WAN’s IP address or for one of the WAN blocks IP’s enabled for use with the VPN client. You can modify this setting from the pencil shown above under the “Network > Interfaces” section. Once you modify this setting you can press “OK”.
Now the only other thing you will need to do is download the NetExtender application and install it on the PC in question.
After you do all of this, make sure you test the VPN and if you followed these instructions to the letter you should have a working SSL VPN now. 🙂